Granny Hearts Bag

This bag is maybe a little late for this Valentine’s Day, or maybe it’s just really early for the next one? Whichever it is, it’s a fun, textured bag that’s a good use of some smaller balls of yarn!

The bag itself is made up of 18 granny squares crochet together, with a denim lining and a crochet strap. The pattern for it details how to make the granny squares, as well as how to put it all together and make a bag. A good thing about this pattern is the granny squares themselves can be used to make any other item that uses granny squares as a base!

Not only is this pattern up for sale on Ravelry, but it’s now up for sale on Etsy too! Please be sure to check it out!

Panty and Stocking with Garterbelt

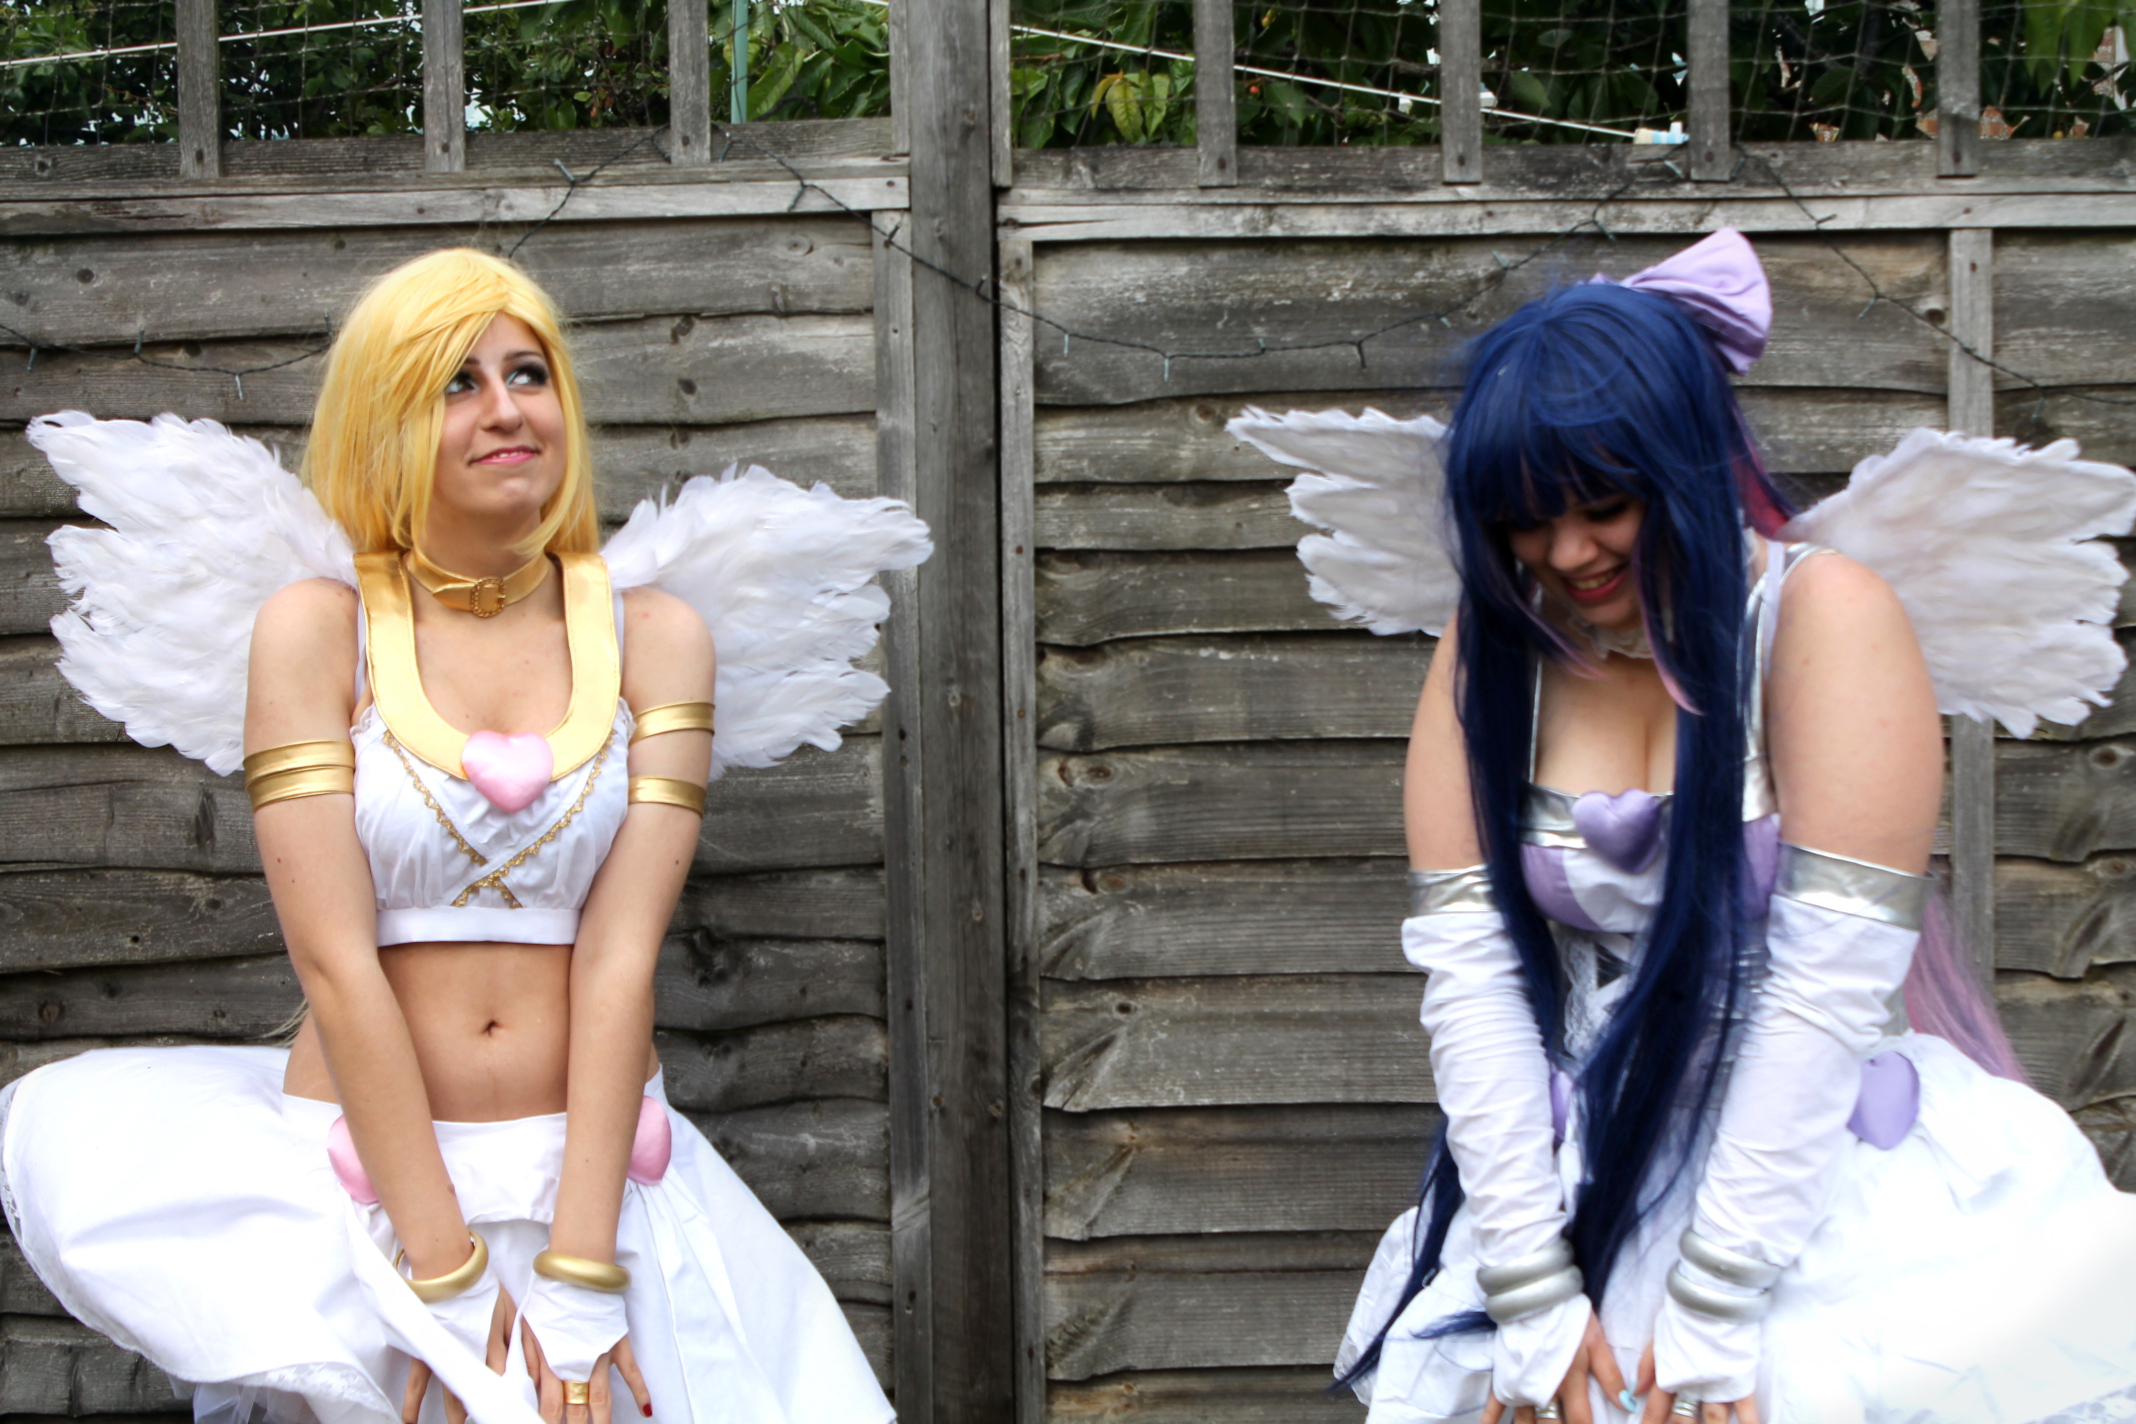
For the last day of MCM London, I partnered up with my friend Ruth to cosplay Panty and Stocking from the anime Panty and Stocking with Garterbelt. Both of us made our own costumes.

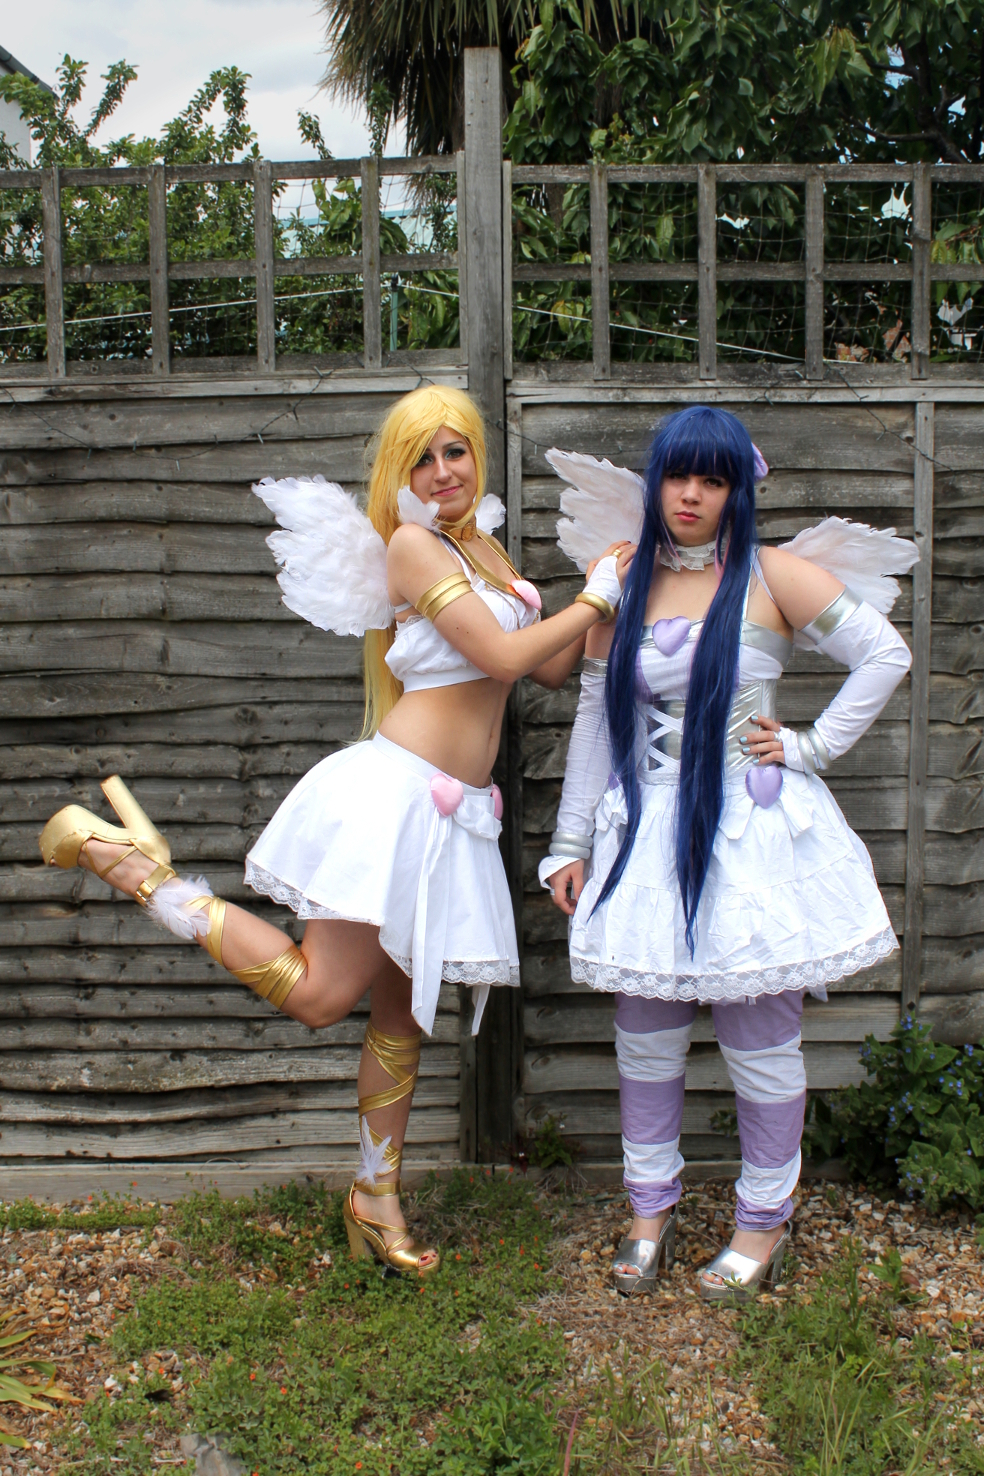
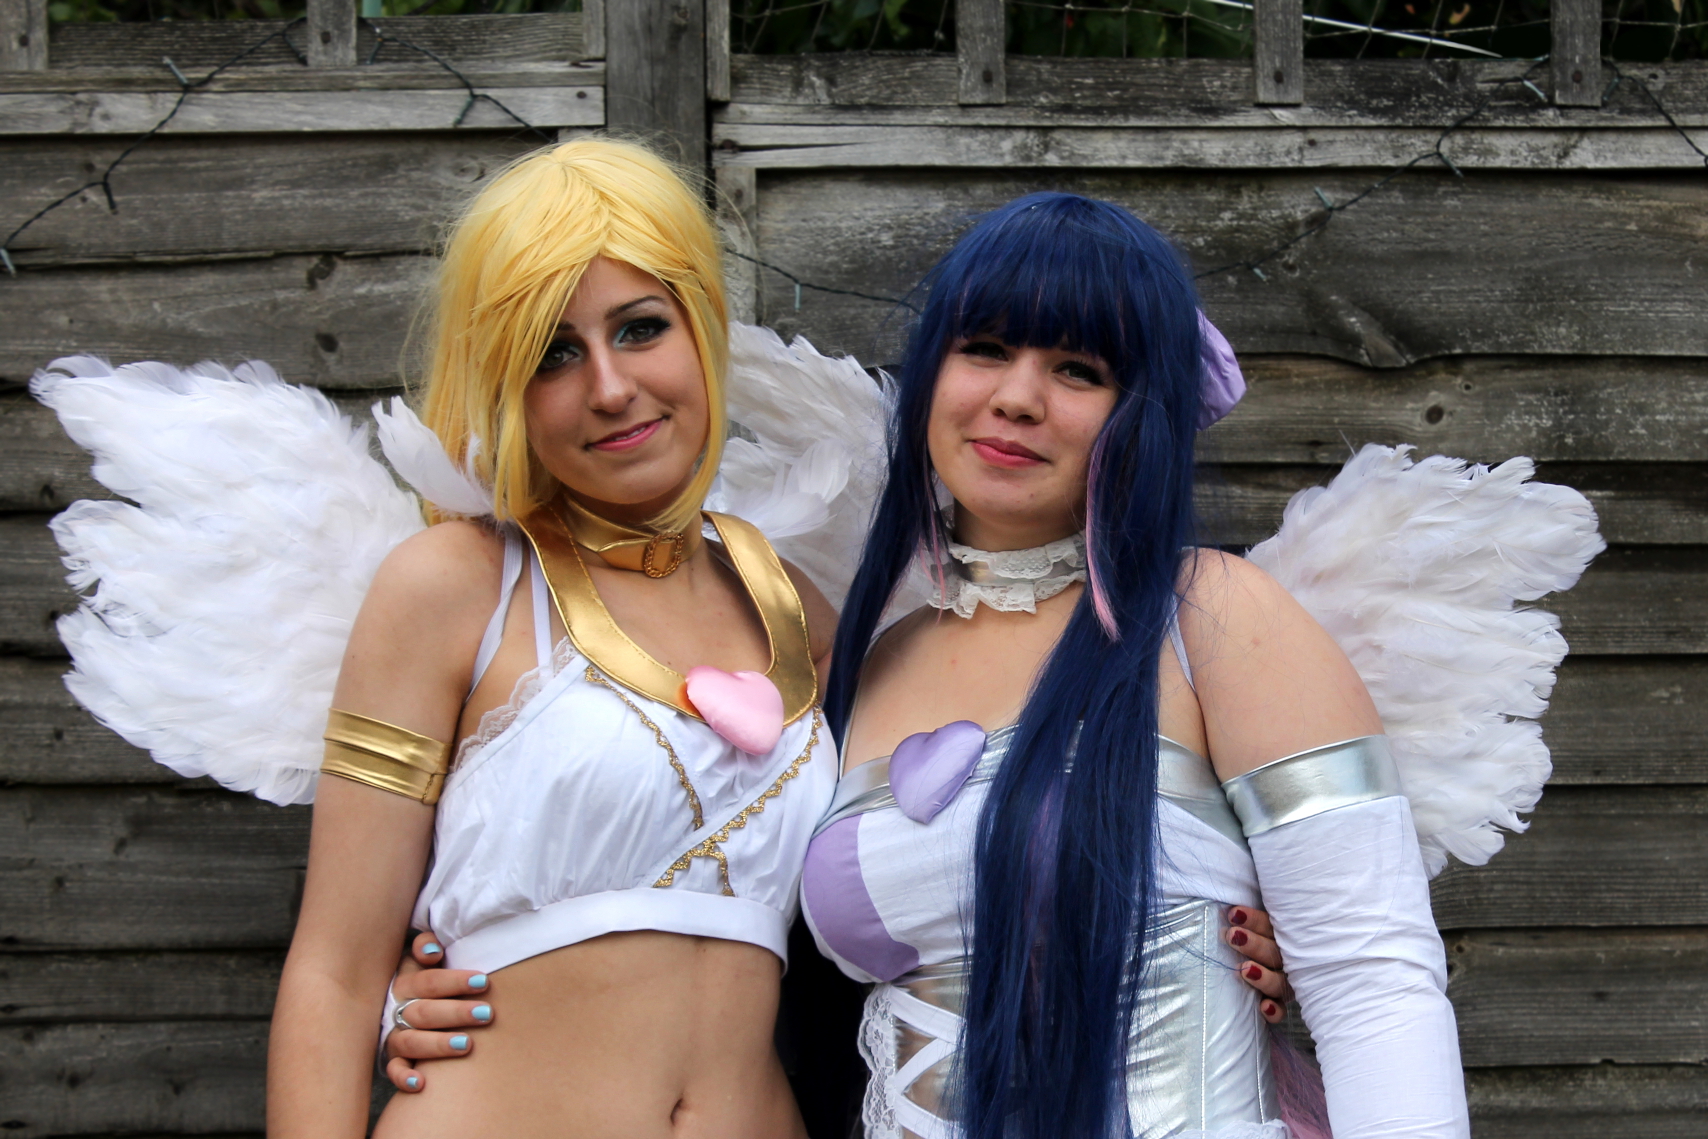
I sewed my skirt, my shirt, my corset, my sleeves, and my leg warmers from white cotton, purple cotton, and a stretchy metallic fabric. The bracelets I painted with silver paint, and the shoes were originally white, which I covered with silver metallic fabric. Ruth patterned the wings, but we both made our own set out of wire, fabric, feathers, and hot glue.

The metallic fabric was such a pain to use because it was very stretchy and pins would leave permanent holes in it. The corset was particularly difficult because the metallic fabric had to be backed onto a stiff muslin. Hopefully I’ll be able to write a more in depth post about how I made the corset despite neglecting to take photos of the whole second half of the process.

Luckily, that Sunday was the coolest of the days, meaning the costume wasn’t too warm to wear. I did have an issue with the shoes, but that was mostly due to my own poor use of glue. Bits of hardened hot glue jabbed into my heel, and the fabric slowly peeled off the shoes. If I were to cover shoes with fabric again, I’d probably do it over the course of a few days using some kind of super glue, or maybe modge podge.

group panty and stocking

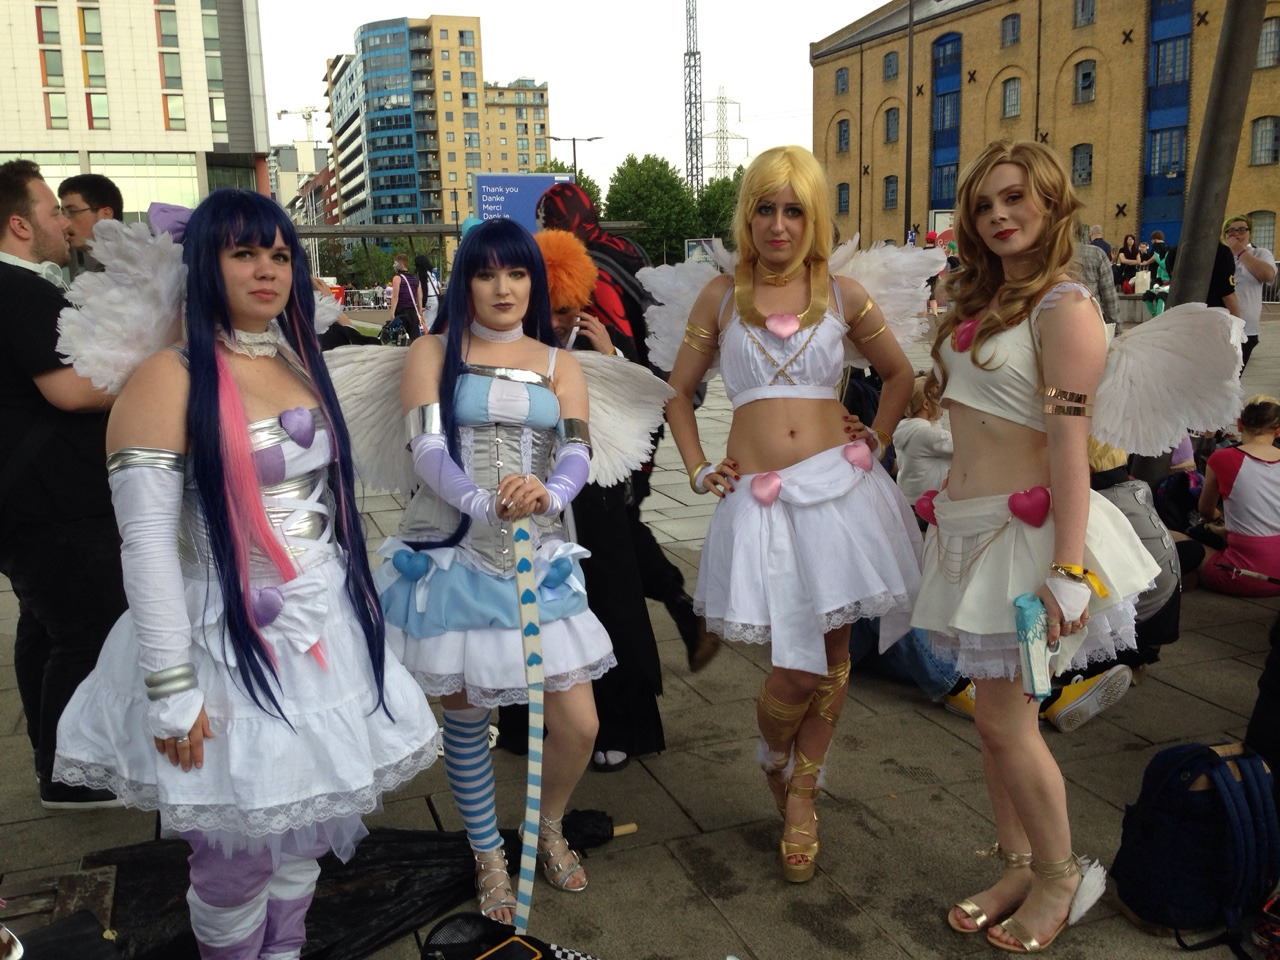
We also met a couple of lovely cosplayers who were cosplaying the same characters as us! I only have a link for the Panty cosplayer’s Instagram, but she has some super cute cosplays on there, so definitely check out her page! I especially loved what they used for the hearts on their outfits!

Photos taken by Daisy Tweed

New Fabric Designs!

If you have a Spoonflower account and follow my account, you’ve probably noticed some new designs. I’ve been working on a fabric collection based on paint.

fabric photo bllue and black splatters

The first fabric, called Black and Blue Mirrors, is a simple black and blue repeating pattern. I created this design using acrylic paint and paper. I then scanned the painting into my computer and cleaned it up as much as I could before I ordered a yard of fabric from Spoonflower.

Why did I order a yard of fabric, you ask?
13235751_1279093012118230_1632974195_nFor a swap with Alice the Insane, of course! I gave her a yard of my design printed on cotton poplin ultra in trade for a super cute bag that she made to match our Kylo Ren and General Hux cosplays that we wore to MCM London. 

13444170_490185707847044_1883455511_n

I really like the bag she made, and I’ve been using it so much! It’s a really good size for everything I need with me on a daily basis.

13250474_1279092878784910_492591044_n I love the dress she decided to make from the fabric, I think she did an amazing job keeping the pattern intact and that having the design off center was fresh and different.

13249616_1279092972118234_616445597_nShe added bias binding to the neck edge, and the dress opens at the side with a zipper. Isn’t it lovely?

painted stripes fabric sample

This is the other fabric that I designed, also made using acrylic paint, paper, and a scanner. It’s only the second fabric in my ‘Paint’ fabric collection, and I’m hoping to add at least two more painted fabric designs over the summer.

13236295_1279093835451481_50537210_n

Be sure to check out Alice the Insane’s facebook page!

If you’re interested in purchasing either of these fabrics, they are available here.

Grandpa Vicki

vickis hat

My friend’s friend Vicki asked me to make her a hat that said ‘Grandpa Vicki’ on it. I made this one the same way that I make all of the knitted slouchy beanies, but with the addition of a simple pom-pom. If anyone is interested in the basic ideas behind it, I can make a post about them.

grandpa vicki inside of hat

I designed these letters the same way as I did the ‘ANGEL’ hat, using this knitting graph stitch template. I also used the same method to write the letters, and remembered to take a picture of the inside this time!

If you haven’t liked my facebook page yet, you should! I’ve been writing about the cosplays I did for Bournemouth, and I will be posting about my costumes in detail next week!

All Grown Up Slouched Hat

file_medium2

I made this hat using the All Grown Up Striped Slouched Hat pattern. The pattern calls for the hat to be made using an aran yarn, but I used a double knit (a double knit is thinner than an aran). In order to be able to make the hat to fit my head, I only needed to change the length off the hat. I used a 5.5 mm (I) crochet hook and made the small adult size. I crocheted about 6 more rows in the stripe pattern than the pattern asked for.

The pattern was fairly easy to make, and I learned a new stitch as well as the best method (in my opinion) of making a brim. The pattern calls for the brim to be simultaneously made and attached to the hat, thus eliminating the hassle of sizing the brim to the hat and attaching it. I will definitely be using this brim method for all of my future crochet hats!

Perry the Platypus Dress

platypus-dress-front

This pictures were taken in September…Oops.

The dress is another pattern from Gertie’s New Book for Better Sewing. It’s the Sweetheart Sundress, although I modified it to better fit the idea that I had in my head. I changed the front of the dress so that it is no longer just two pieces (one on each side), but is now five (two on top, three on bottom), changed the back piece by separating the piece along the darts into three separate pieces, and changed the side zipper in order to make a more fitted dress.

platypus-dress-back

The skirt is a simple gathered skirt with a wide lace trim to add a bit of interest to the dress. The first time I applied the lace to the dress, I accidentally melted a segment of the lace with the iron and had to tear out the whole trim and replace it with new lace.

platypus-dress-close-up-of-

This is the inside of the dress. Only the top is lined, and I hand sewed in bra cups for support. The zipper is on the left side, and I did not encase it in fabric on both sides because I was trying to avoid hand sewing as much as possible.

platypus-dress-close-up-of

I think I like the new lace much better.

I found this fabric at Joann’s while looking for a fabric I could use to make a comic book print dress. I think that the fabric fits the criteria I set, because it includes animated characters in a comic book print design. It’s a cotton blend printed with the Phineas and Ferb characters with a focus on Perry the Platypus.

platypus-dress-spinny

Whee!

The Zig-Zag Dress

DSC00696

Oh man, look at that pattern matching on the princess seams!

I made the zig-zag dress a little over a year ago, sometime in the year 2013. It was part of my “Greyscale” Collection, which, as the name suggests, is a collection made from fabrics in shades of grey, black and white. The collection was inspired by the outfits in old black and white movies.

back-of-zig-zag-dress-2

The pattern is Vogue V8808 cut out in option B. I really like this dress style, especially the collar, shape, and length combination. I made the zig-zag dress before I had been told it is a much better idea to trace the pattern pieces, so all of the pieces are actually cut out of the original pattern paper.

side-of-zig-zag-dress

What happened to the pattern matching on the sides??

I’m really proud of the pattern matching on the princess seams (zig-zags AND curves? What was I thinking?!), but not of the pattern matching on the side seams. The reason for this is probably because I sewed and serged the side seams of the lining and the outside fabric at the same time.

inside-of-zig-zog-dress

The inside of the zig-zag dress isn’t very pretty, but at least I serged all of my seams.

Because the zig-zag fabric was very lightweight and see-through, I did not make a full lining, and instead ended it above the knee with a terribly uneven hem. Luckily, it’s not obvious that the lining hem is uneven from the outside, and instead looks like it transitions smoothly from lined to unlined.

back-of-zig-zag-dress

Despite its flaws, I still really like the zig-zag dress – I mean look at those princess seams!

Winter Gifts! (Part Two)

I apologize for this post being so late, I did not have all the pictures until recently.

P1010683For Christmas,  my friend Hilary gave me some beautiful red alpaca yarn, which I quickly made into fingerless mittens from this pattern. The pattern was quick and easy to make, and looks beautiful!monkeyIn return, I made Hilary a knitted reversible cowl, called the Boomslang, in dark pink and white yarn (modeled by my sister). This cowl worked up fairly quickly for a cowl but still took quite a bit of time. I’d intended to give her the cowl before winter break, but I ran out of time and instead had to give it to her after break.cupcakeFor my cousin’s birthday on January 13th, I made her a hat! I based it off off of this pattern. I had to heavily modify the pink cupcake shape in order for it to curve properly, and then I ran out of yarn and was unable to make the icing ruffles around the edge, but I’m still pretty happy with how the hat turned out.


“Spark” Slouchy Hat

Image

A slouchy hat made with three colors of yarn in double and treble crochet.