Hats!

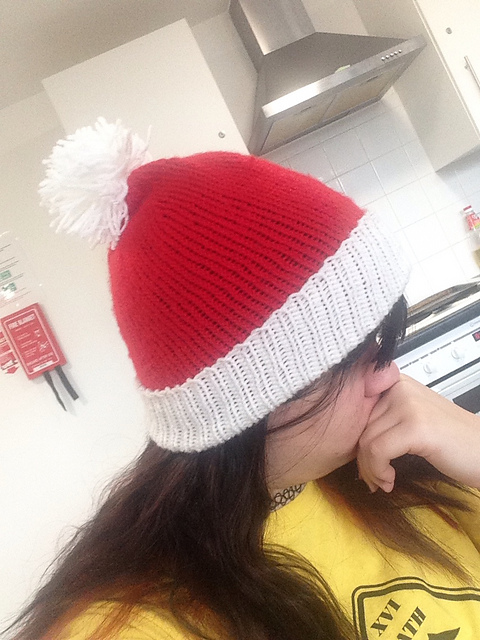
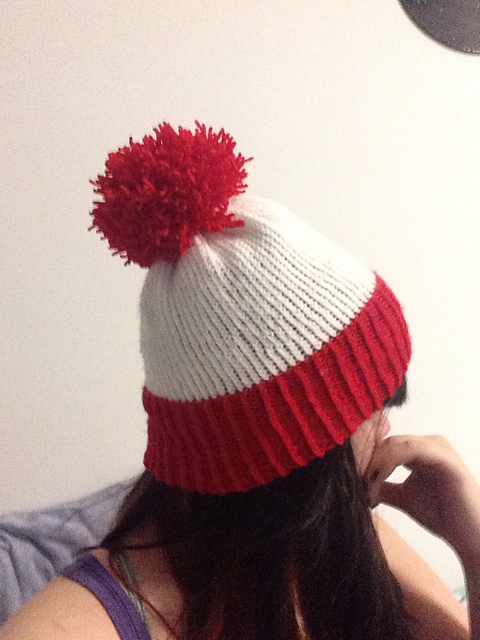
These are the two hats I knitted for my friend Ruth for Christmas. She asked for a Where’s Waldo Hat, and I messed up the first hat, which is the one on the left. It is clearly not a Where’s Waldo hat, and is instead a Santa hat. I realized my mistake too late, and so finished the Santa hat before moving on to the Where’s Waldo one.


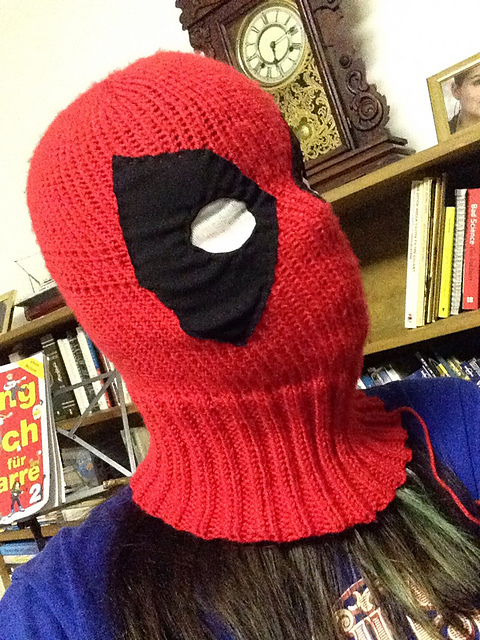
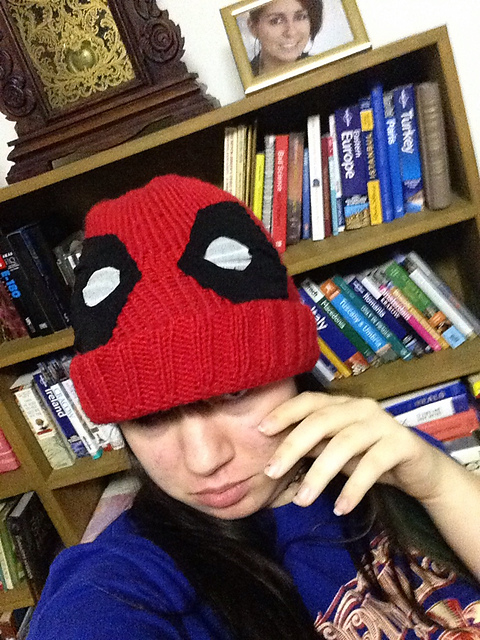
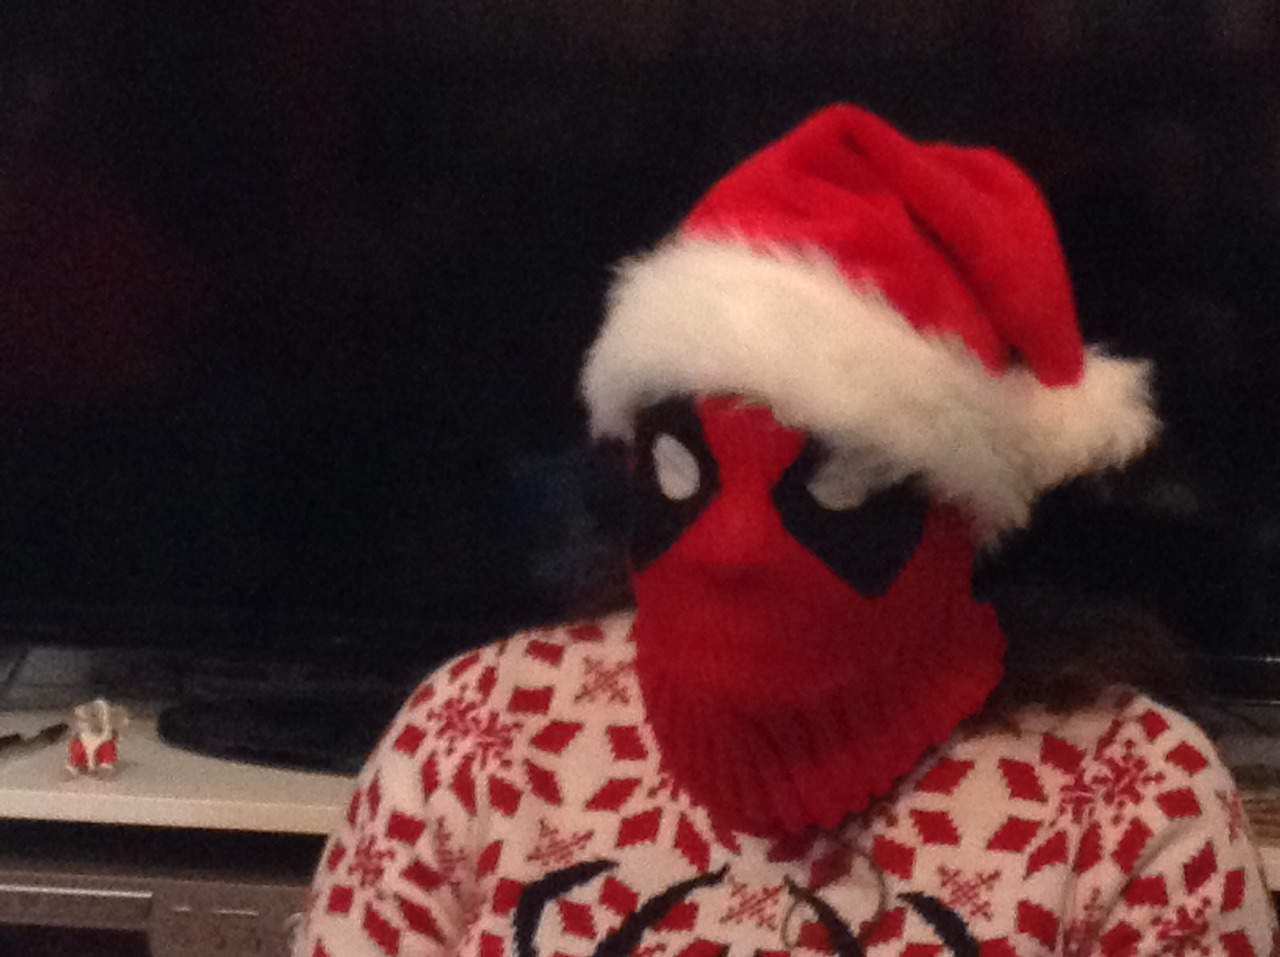
This is the Deadpool hat/balaclava I made for Ruth’s sister. The base is knit in red following the Jackyll & Hide pattern, and I hand sewed on black shapes to outline the eyes, and then put white netting underneath so that it could be used as a mask.

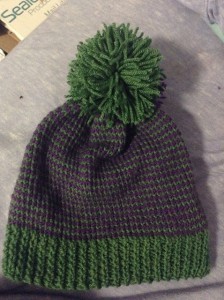
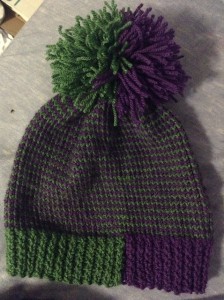
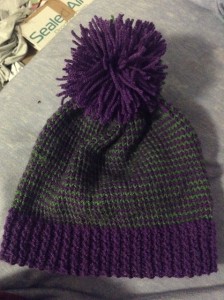
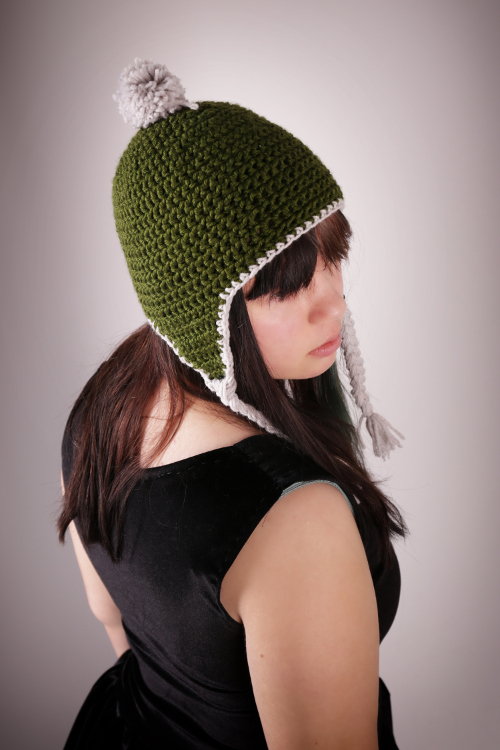
I made this hat for a knitting trade with my friend Katie. We wanted to do a trade of ‘ugly hats’. I worked with both colors at the same time from opposite sides of the hat to create a striped pattern that spirals to the top, where I made the biggest pom-pom I could.

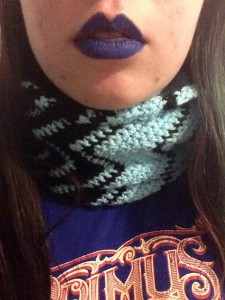
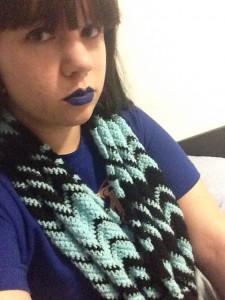
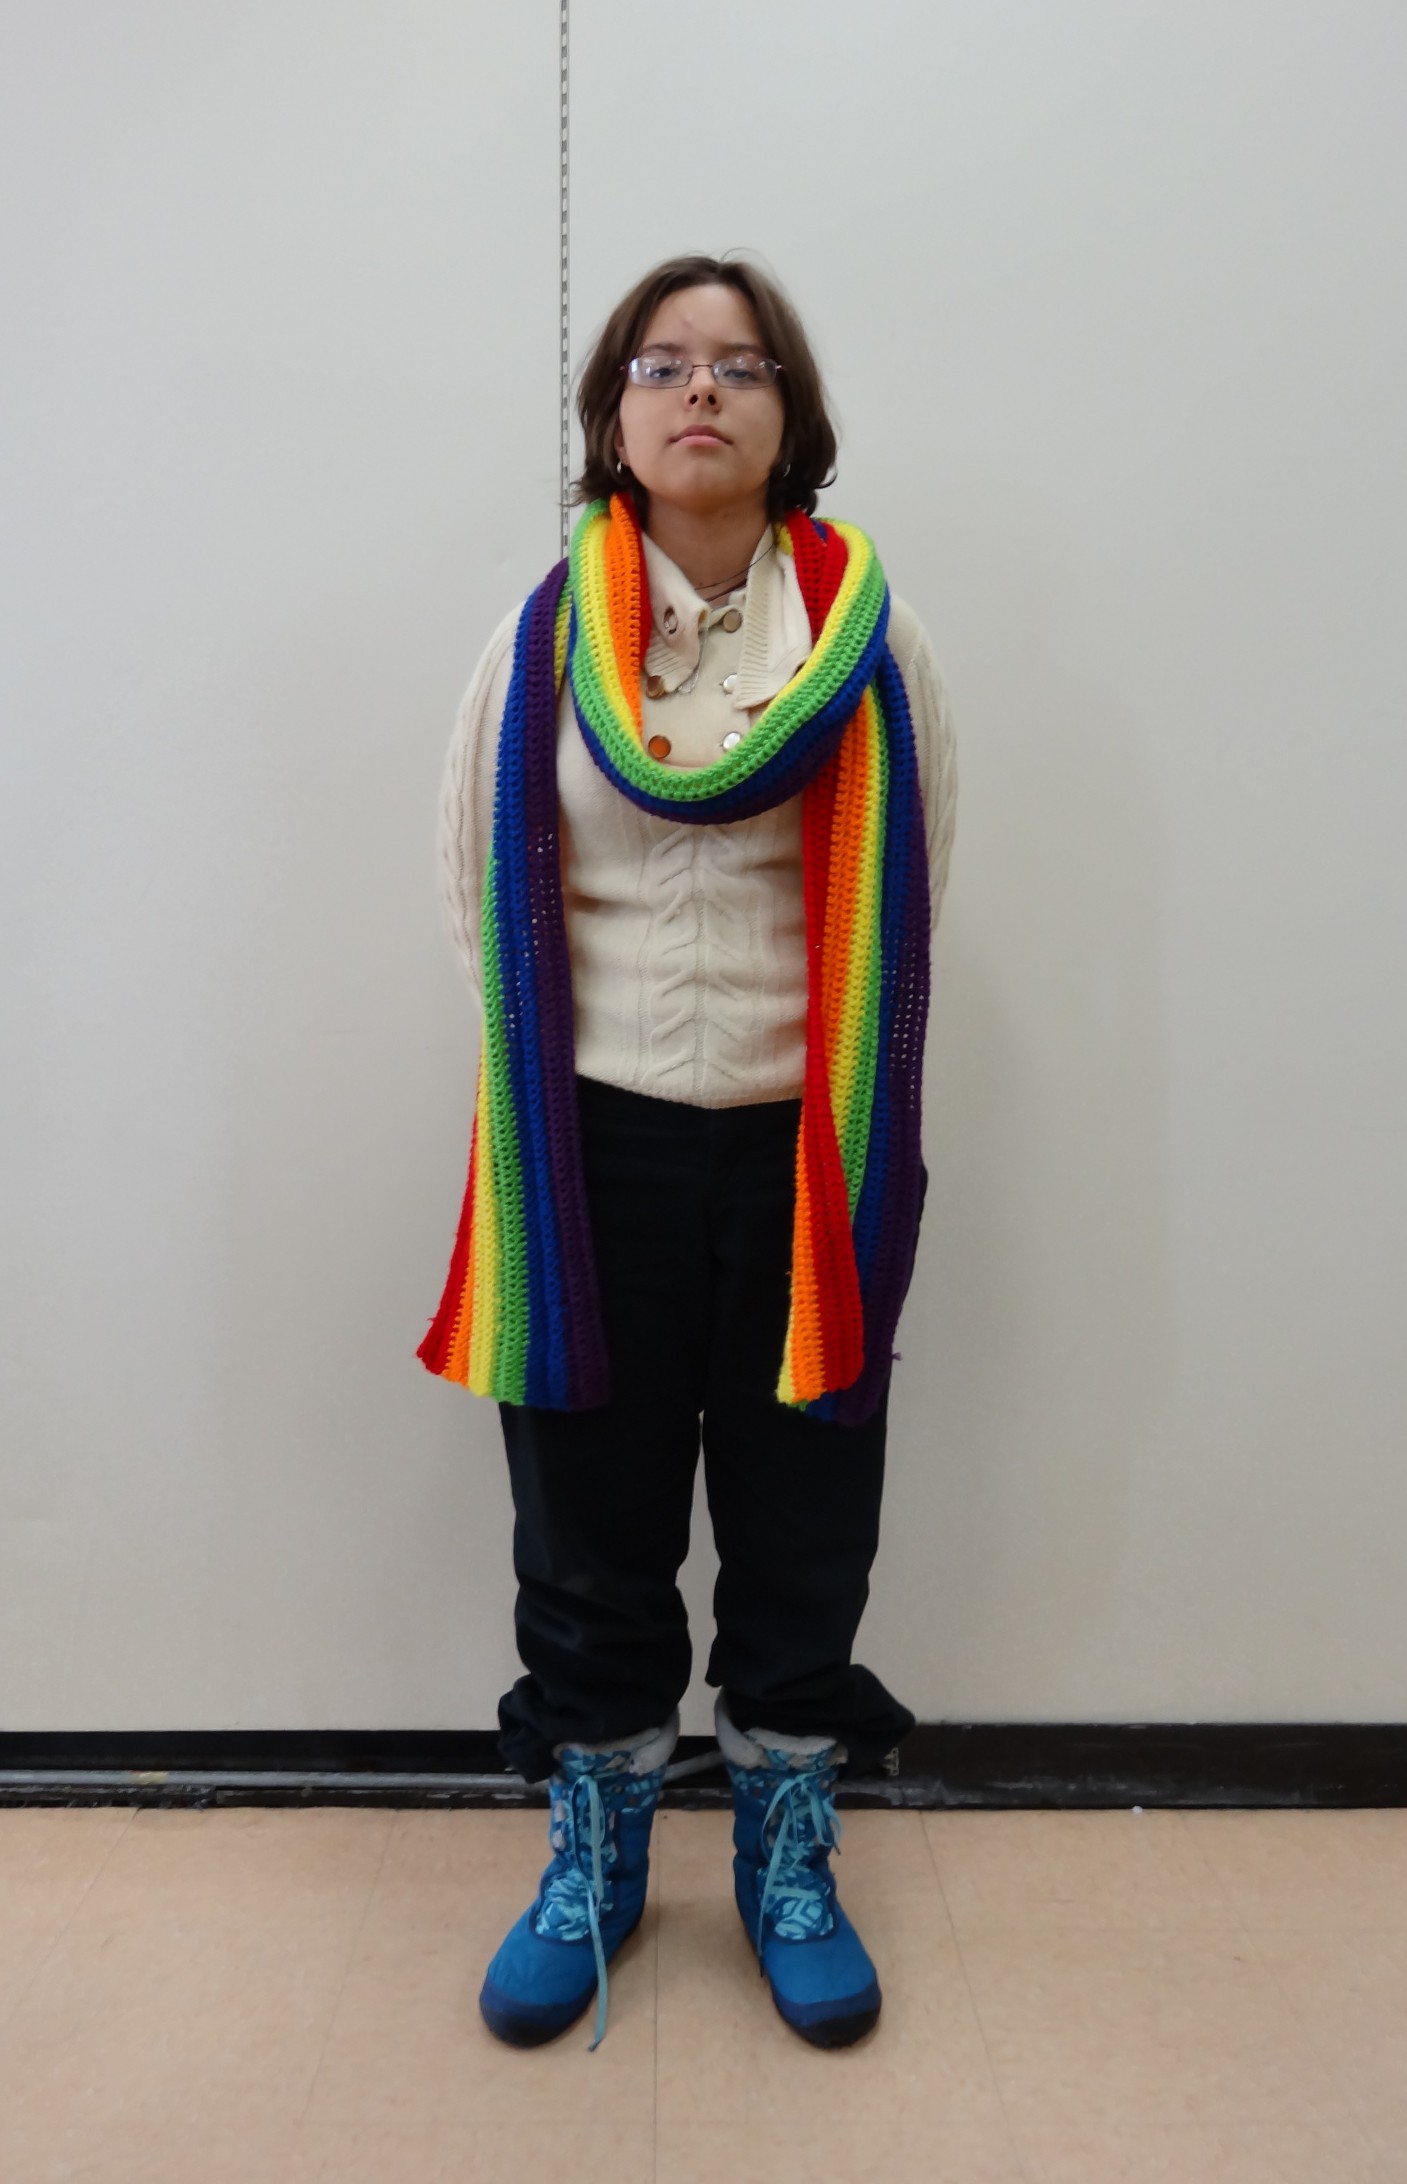
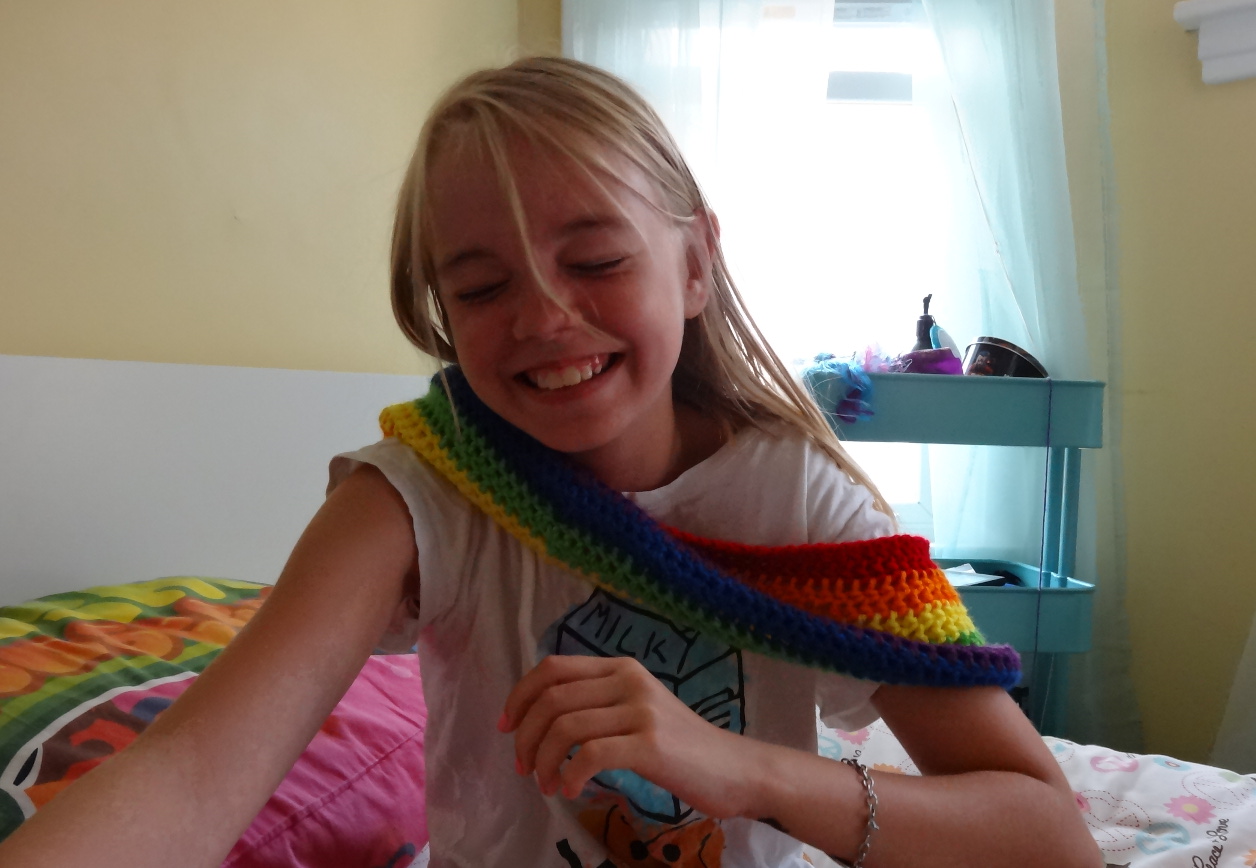
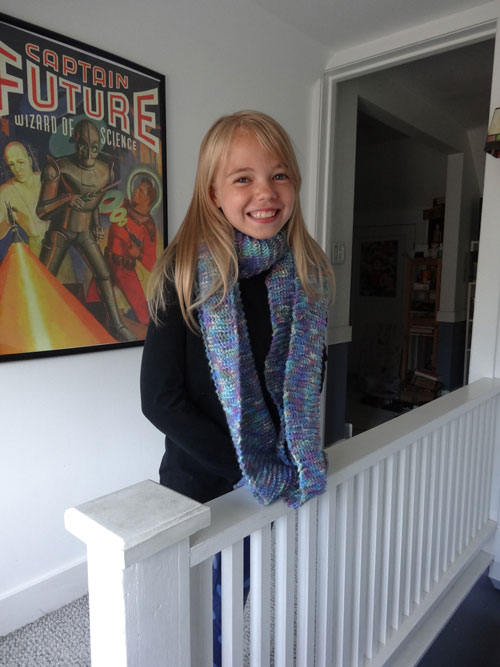
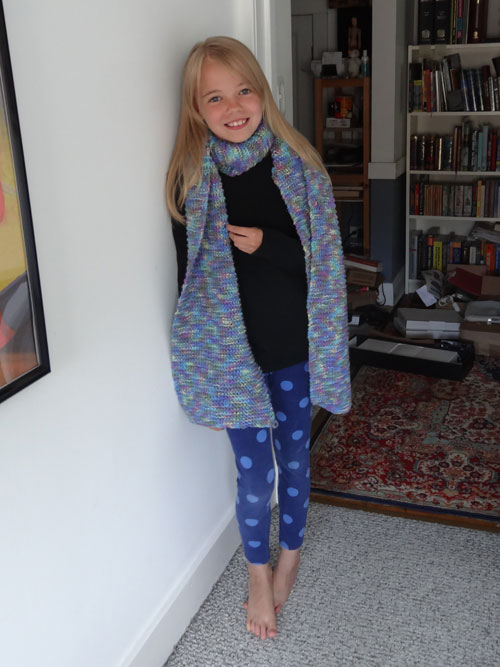
This zig-zag scarf was made for my friend Nicole’s birthday.

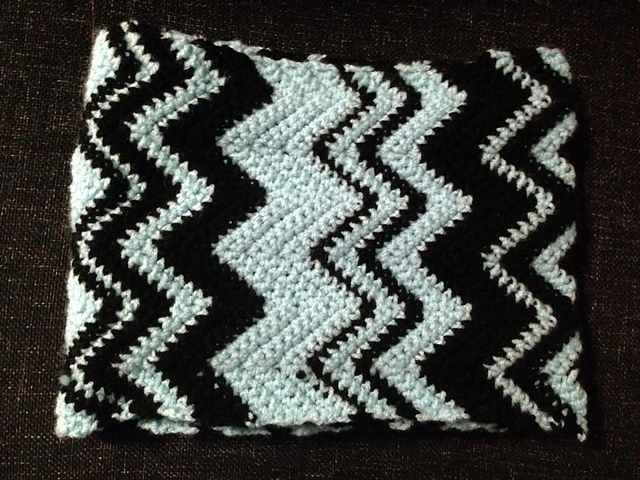
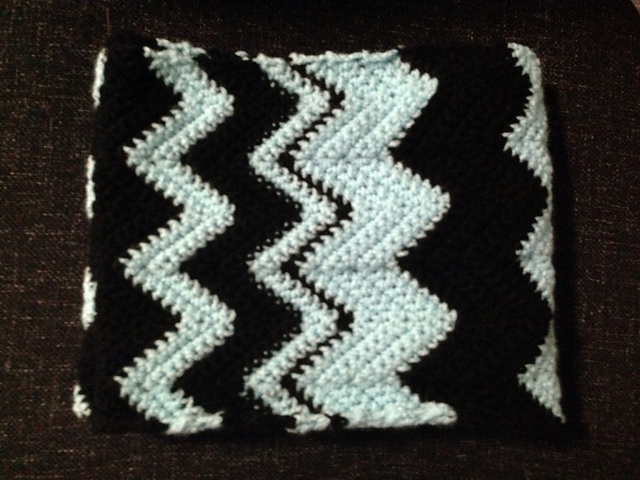
I decided on each row’s color by flipping a coin for each row, resulting in a lovely, truly random pattern.

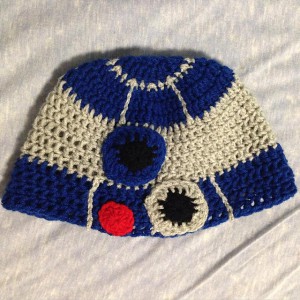
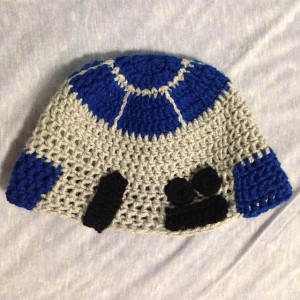
That’s right, it’s an R2D2 hat! I made this to celebrate the new Star Wars movie, and used the Star Wars Droid Beanies pattern. I modified the hat a little bit by adding two extra rows, one where the hat is solid grey, and one at the bottom.

bb8

Yes! Another Star Wars hat! This one is BB-8, a character from Star Wars: The Force Awakens. I used a BB-8 Droid Hat Pattern, and modified the circles to be smaller, and looking at the robot in order to judge where to put them.

santa deadpool

A New School Year

Sorry, it’s been quite a while since I’ve last posted. Since then, I have moved to England and started my first year studying costume design and construction at a university level. I’ve been working very hard in class, and so kept forgetting to post. (oops!)

During winter break, I went to Austria with my friend Ruth and stayed with her family. While in Austria, Ruth and I visited her photographer friend, Bildersanatorium, who was kind enough to take photographs of the many pieces I have made since September.

Slytherin Hat

I had made this hat to match a scarf I’d made, but I lost the scarf almost immediately upon its completion.

This hat was the second thing I made after moving to England. It’s a very simple earflap hat made from double crochet and single crochet, with braided tassels and a pom-pom.

In most of the photos I look very serious.

I actually look happy in this photo.


This dress is made from a very nice stretch velvet I picked up from BSP Haberdashery. I felt it, and I just had to take it home with me. I made up the dress pattern as I went along, copying one of my tank tops for the bodice, and gathering two rectangles for the skirt. The dress is so simple that I was able to hand sew the entire dress in one night.

Ruth with Red hat and Harley Quinn Scarf

Ruth with Red hat and Harley Quinn Scarf


This is my friend Ruth in cosplay as Mavis from Hotel Transylvania. She is modeling a knit hat and a crocheted scarf. The hat is a super simple pattern, I just altered knit and purl stitches until it reached the length I wanted, and then decreased. The scarf is made from the basic tunisian crochet stitch, which ended up making the fabric very thick and warm, but also caused a strange drape. I started making the scarf in red, but switched to black when I ran out of red.

Green Hat Front Green Hat


I made this hat for Ruth’s dad for Christmas. It’s a plain knit hat with a ribbed cuff.

Purple Cat Hatpurplecathat2


This hat is made for Ruth’s mom using the Kitkat Hat Pattern. The pattern was super easy to make, and I love the result!

Blue Cable Hat Blue Cable Hat 2


This is my favorite hat. It was my first time working with cables in a pattern and I love it so much! I used the Traveling Cable Hat Pattern and I found the instructions very easy to follow, although I did get confused while I was making the ribbing and messed up a bit. If you want to see in progress pictures of my hat, please click this link.

maroondress3 maroondress1


This dress is actually a project from spring of last year. It’s made from the same pattern as the French Fry Dress out of a soft woven plaid fabric. I did not match the plaid because it is a very small print, and I lined the bodice with the same fabric used in the rest of the dress.

I am planning on posting more often this year, and hopefully I’ll stick to that promise!


Rainbows and Scarves and Hats (Oh my!)

I’ve made a lot of stuff in the past few months, so I’m going to try and separate it all into manageable posts.

In February, I was comissioned to make a rainbow scarf for my friend Marzena.

DSC01065

I accidentally crocheted the scarf a few feet longer than I had meant to, mostly due to the chain stitch stretching.

DSC01062

It’s pretty simple, made only with double crochet, each color being three rows wide. This was probably one of the biggest projects I’ve crocheted.

DSC01069

Then, one of my other friends asked me to make a rainbow cowl.

adelaide scarf

The first one I made in February, (pictured above) but it was too small, so I made another one that was longer in March.

DSC01133adeliade again

I forgot to take pictures of the second one, however. My apologies!

More recently, (last week!), my friend Claire, who also knits, asked me to knit a hat!

Rainbow knit hat

Claire outlined a pattern for me verbally, saying I should start the hat with 54 stitches, and then decrease by six once it was the desired length.

rainbow hat inside

I forgot Claire’s instructions, and instead started the hat with 64 stitches, on needles that were two sizes too big.

Claire in hat

Luckily, I knit extremely tightly, so the hat fit just fine!

That just about sums up all the rainbow stuff I’ve made since February. Look out for more posts containing more recent makes!

February and March

FebruaryJasmine in a Hat

This dc slouchy hat is worked in three colors of yarn, the majority in grey and black held together, with yellow as the brim. The waves on the edge were made using sc, hdc, and dc.

Alexis in a Hat

This is another simple dc slouchy hat, but this time it has a detail in sc around the edge, as well as a pom pom at the top.

This hat is made from one of my own patterns which is available for free on Ravelry.

March

Sadly, this is the only picture I have of this slouchy hat. It is very simple, worked only in double crochet with four colors of acrylic yarn.

Octopus

This octopus was something I worked up quickly during class at school using this pattern. I believe I  gave him away to one of my friends in Japanese class.


I have made a lot more things since then (as well as a few more during those two months), so look out for some more posts in the near future!

Uchi-Con

Hello!

Sorry for the lack of posts, I’ve had a lot to work on! I just finished my portfolio for costume design, which can be viewed right here or by clicking on the link labeled ‘portfolio’ at the top of the page. Some of the garments are unblogged, but I hope I can put some information about them up eventually.

In addition to creating this portfolio, I have been preparing for Uchi-Con, which I went to yesterday. According to ravelry, I have spent about two weeks furiously crocheting hats for this convention.

view-of-the-table

Our table right before the con opened

I shared a table with the Mangaka club from our school. They took up most of the table and sold buttons, prints, and commissions. I sold the hats that I had made over the past couple weeks, and I worked on crocheting more items while sitting behind the table.

view-from-the-table

The view from our table (if you look closely, you can see cosplays of the Gorillaz)

I completed a total of five hats before the convention, and then I completed another hat at the beginning of the convention, making for a total of six hats up for sale. All of the hats were patterns that I free-handed, meaning I didn’t use a pattern and just made to fit my head. Three hats were pokéballs, one had cat ears, one had earflaps and bear ears, and the last one had a brim and a pom-pom at the top.

view-of-the-table-busy

Our table was pretty busy, and we often had big groups of people around our table. Many people stopped by to complement my work and to buy buttons.

Before the convention began, I was concerned that I would run out of hats, but in the end, I only sold two hats. The pokéball hats were my most popular item, and I’m thinking about opening an online store to sell these hats as well as other items that I have made.

I had a couple chances to walk around Uchi-Con during the day, and since this convention was kind of small, I was able to stop by every booth (there were about fifteen). I ended up buying a super cute cake charm from Dreaming Wings and a soft pastel barrette from Colour My World Creations. It was really hard to chose!

The Gorillaz

I don’t have a link for these guys, but if anyone knows a website to link this to, please let me know!

Overall, Uchi-Con was really fun and I loved seeing all of the cosplays and the work that the tables had on display. I would definitely suggest going next year!

Perry the Platypus Dress

platypus-dress-front

This pictures were taken in September…Oops.

The dress is another pattern from Gertie’s New Book for Better Sewing. It’s the Sweetheart Sundress, although I modified it to better fit the idea that I had in my head. I changed the front of the dress so that it is no longer just two pieces (one on each side), but is now five (two on top, three on bottom), changed the back piece by separating the piece along the darts into three separate pieces, and changed the side zipper in order to make a more fitted dress.

platypus-dress-back

The skirt is a simple gathered skirt with a wide lace trim to add a bit of interest to the dress. The first time I applied the lace to the dress, I accidentally melted a segment of the lace with the iron and had to tear out the whole trim and replace it with new lace.

platypus-dress-close-up-of-

This is the inside of the dress. Only the top is lined, and I hand sewed in bra cups for support. The zipper is on the left side, and I did not encase it in fabric on both sides because I was trying to avoid hand sewing as much as possible.

platypus-dress-close-up-of

I think I like the new lace much better.

I found this fabric at Joann’s while looking for a fabric I could use to make a comic book print dress. I think that the fabric fits the criteria I set, because it includes animated characters in a comic book print design. It’s a cotton blend printed with the Phineas and Ferb characters with a focus on Perry the Platypus.

platypus-dress-spinny

Whee!

The Zig-Zag Dress

DSC00696

Oh man, look at that pattern matching on the princess seams!

I made the zig-zag dress a little over a year ago, sometime in the year 2013. It was part of my “Greyscale” Collection, which, as the name suggests, is a collection made from fabrics in shades of grey, black and white. The collection was inspired by the outfits in old black and white movies.

back-of-zig-zag-dress-2

The pattern is Vogue V8808 cut out in option B. I really like this dress style, especially the collar, shape, and length combination. I made the zig-zag dress before I had been told it is a much better idea to trace the pattern pieces, so all of the pieces are actually cut out of the original pattern paper.

side-of-zig-zag-dress

What happened to the pattern matching on the sides??

I’m really proud of the pattern matching on the princess seams (zig-zags AND curves? What was I thinking?!), but not of the pattern matching on the side seams. The reason for this is probably because I sewed and serged the side seams of the lining and the outside fabric at the same time.

inside-of-zig-zog-dress

The inside of the zig-zag dress isn’t very pretty, but at least I serged all of my seams.

Because the zig-zag fabric was very lightweight and see-through, I did not make a full lining, and instead ended it above the knee with a terribly uneven hem. Luckily, it’s not obvious that the lining hem is uneven from the outside, and instead looks like it transitions smoothly from lined to unlined.

back-of-zig-zag-dress

Despite its flaws, I still really like the zig-zag dress – I mean look at those princess seams!

French Fry Dress!

seated-view-of-fronch-fry-d

This is a rather silly pose.

This is the dress that I briefly mentioned in this post. I finally got outside and took some pictures of the dress! (Seven months after I made it-Oops!)

three-quarters-back-view-of

If you look closely, you can see my earrings are French flags! Get it?

The pattern I used for this dress is the Seersuker Sundress from Gertie’s New Book for Better Sewing and I used two yards of French Fry fabric. Since both the book and the fabric were Christmas gifts, I found myself with two yards of fabric and a pattern that called for three. Luckily, when I went to lay out my pattern pieces, there was easily enough space for all of them.

french fry dress in progress

“In Progress” featuring a helpful cat.

Pictured above is the muslin I made for the dress. I only made one muslin, and I only needed to adjust the front and back by taking them in by about 5/8 of an inch. I fully lined the dress with the muslin.

back-view-french-fry-dress

Hand sewing may take a long time, but it’s worth it!

I put in an invisible zipper instead of a lapped zipper, and this is the best invisible zipper I have ever done. The secret is to hand sew the whole zipper. I also took my time on the gathered skirt in order to make sure the gathers were perfectly even. Instead of gathering by sewing over a thread and pulling it, I pinned every gather out individually.
In fact, this garment is probably the best I have ever made. My only regret is that I didn’t take more time with the four darts in the front of the bodice – I could have adjusted them to fit better. Despite this, the French Fry Dress has been worn a few times already, (It was too cold to wear when I made it) and will definitely be worn over and over again in the future.

The Three Year Scarf

In the beginning…

By my calculations, I started knitting this scarf in 2011. I’d wanted a really wide, long scarf that would keep me warm all winter, and I wanted it to be easy to make.

When the scarf reached about four feet, I ran out of yarn, and I looped it around into a cowl. I wasn’t completely happy with this and would check every yarn store for another ball of the yarn.

I’m not sure where I finally found the correct yarn. I think my Grandma might have given it to me, but I’m not sure. I immediately tore out the line of stitches keeping the cowl in place, and began knitting the rest of the scarf as fast as i could. The official completion date was June 8, 2014.

adelaide-in-scarf-on-railin

Adelaide was really reluctant to be in these pictures.

Overall, I am really happy with this scarf. It’s all made with the same stitch, so it’d be really easy to make again (although it did take a long time to make).
adelaide-in-scarf

It turned out exactly the size I wanted it to be: about 6 feet long and 10.5 inches wide. Although there’s about half an inch of difference between the widths on each end, it is my favorite scarf, and I will definitely get a lot of wear out of it as soon as it starts getting cold again.


WIP

I have so many things I’m working on right now, and so many pieces of fabric/yarn that I have plans for!

Untitled-1This dress is made out of a whole bunch of fat quarters as well as some suiting fabric for the skirt. It’s one of my pieces that is closest to being complete – all that needs to be done is the hems and all of the hand sewing. My plan for this dress had been to finish it in time for a school dance, but I ended up with only three days to make the entire dress, two of those being school days!

crochet and knit wipI found these projects in a bag in my closet. I don’t think these will ever be finished, and will probably be frogged soon. The cowl is knit, and the doll is crochet, and resembles the fairies from Humanity Has Declined (creepy!).Fabric IdeasThese are pieces of fabric that I have plans for/don’t know what to do with. The fabulous Phineas and Ferb fabric will be made into a dress inspired by a comic book dress I saw online.

The two fabric swatches on the right are from the website Spoonflower. I received both of those swatches during two separate free swatch promotions hosted by Spoonflower. The swatch on the far right is a silky faille swatch of the fabric Chibi Great Ones. I’m not a big fan of how the fabric feels, but I love the adorable Lovecraft based design! I might have to buy more! The fabric swatch right next to it is my own design, Polka Dot Cats! My swatch is printed on Organic Cotton Knit, and I’m really happy with how it came out. I made some small adjustments, and now it’s up for sale as fabric and gift wrap in my Spoonflower Shop!

I’m not sure what to make out of these two swatches, but I think that they would make cute pockets on a skirt or a sweatshirt. However, I do want to buy more of my design and make either a pleated skirt or a dress.

These aren’t all of my works in progress, but these are the ones I don’t think I’ll be finishing very soon. I have a few finished objects that I hope I can get pictures of soon, but there aren’t many good places to take pictures in my house (note the above pictures being taken in front of a door) and there’s so